
Starting a campfire isn’t always as easy as it looks. If you do it the wrong way, you can waste time and wood, burn yourself or others, damage structures, or even worse, start a forest fire.
We don’t want you to suffer campfire embarrassment or harm, so we put together this guide that explains everything you must know on how to start a campfire the right way.
With the proper tools and directions for the best fire-building methods, you’ll have a fire burning fast!
You’ll even be able to use them for cooking!!!
Before You Begin Building a Fire
Ensure a Campfire Is Legal
Before you set up at any campground, the first thing you need to do is check with a ranger or local authorities to ensure it’s safe to make a fire.
Many regions have restrictions on open fires during specific seasons of the year to prevent accidental wildfires. Local government, private campground, or state or national park websites typically post no-burn notices.
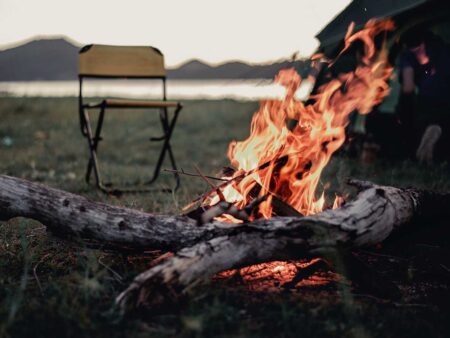
Build a Campfire in a Safe Location
If your site has a campfire ring or fire pit in place, that’s the right way to build one!
If your campsite doesn’t have a spot for fires, you’ll need to build a fire ring. We put handy instructions below on how to build a fire pit.
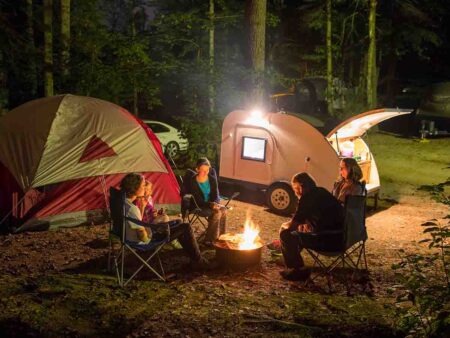
Firepits need to be 20-50 feet from tents, trees, structures, or any other flammable material.
Only Use Local Firewood
Nature conservancy agencies ask that you never bring in firewood from any location more than 50 miles from your camping destination.
Pests love to live inside dry woodpiles, and introducing invasive species to a delicate ecosystem by hauling wood from afar can destroy swaths of forested land.
Only purchase or collect local wood for burning.
Some campgrounds allow you to gather deadwood as a way to help clear fallen branches or trees that can be a brushfire hazard, while other places forbid it because it disrupts the natural habitat.
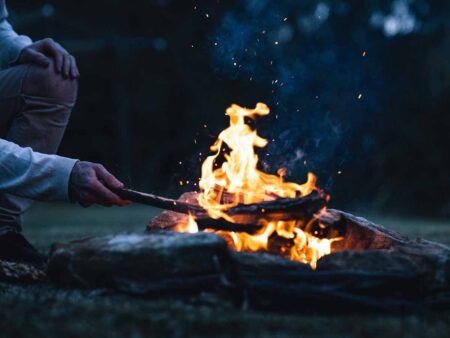
Prep the Campfire Area
Now you need to prepare the campsite and organize your supplies. It’s best to perform these tasks before dark.
The right way is to clear any natural debris from around your campfire area where you want to build one. You don’t want anything that could easily catch fire if embers jump from the pit.
Always have a hose or large bucket of water or dirt close by to douse flames quickly. Never leave even a small fire or hot embers unattended while camping.
Avoid using liquid accelerants like gas or lighter fluid that can quickly cause a fire to get out of control.
Campfire Supply Checklist
Bring along these supplies with the rest of your camping gear:
- Matches
- Lighters or Flint
- Fire Starter Material
Some campers love to test their skills using tools like the Survival Spark Magnesium Fire Starter that scrapes off magnesium bits onto your kindling then the tool produces a spark to light the material. Other camping enthusiasts like the consistency of using a flint and striker tool to create hot sparks to ignite a fire.
Camping matches or wind and water-resistant lighters are other good products to always keep in your camping survival kit.
How to Build a Campfire Pit the Right Way
Building a fire pit if one doesn’t exist isn’t tricky, and it’s how to make fire burning at the campground safer.
Start by choosing a clear spot and remove loose organic debris from the area. Look for gravel, sand, or mineral soil (found in stream beds) to use as a base for the pit.
You can skip this base layer if no such material exists and only work with dirt.
If there are plenty of rocks present, gather enough to create a circular wall to help contain the fire.
Other camping experts like to use a large flat rock as a firebase or build up a fire mound using a flattened pile of dirt or sandy material about 5-6 inches high and 4-5 feet in diameter.
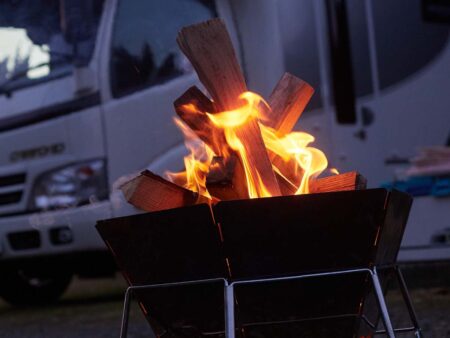
Best Wood to Build a CampFire
Ever see a super smoky fire and wonder why it’s so bad?
The reason is that the person is burning damp wood.
Any amount of moisture inside a log will cause annoying smoke that burns your eyes and makes you cough.
That’s why it’s best to use pre-packaged dry wood that is kiln-dried or seasoned, as it will burn cleaner, with much less smoke once the fire takes off. Less smoke makes the campfire experience much more enjoyable.
When scavenging for wood, look for old, grey-colored logs or branches that feel light when you pick them up.
Do look for wood from pine trees, even if the thick sap makes the wood look moist. Old wood from pine trees starts quickly and burns longer as the sap acts as a natural fuel.
Methods for How to Make a CampFire
How to start a fire in a fire pit begins with deciding which fire building method you want to use.
The way you place logs and kindling impacts the success of getting a fire to start and how it burns over time.
Here are the top campfire building designs:
- Log Cabin
- Lean-To
- Teepee
- Star
- Pyramid or Upside-Down
The log cabin fire lay is the most popular version, and perfect for campfire beginners. The build produces excellent coals that are perfect for cooking over.
The lean-to-fire lay is another popular configuration that is best for fast starts.
The teepee fire lay is simple to start and is ideal for containing heat in a central zone to place under cooking pots or grates.
The star fire lay is a great way to distribute heat around the whole perimeter of the fire pit to keep guests warm or for roasting hot dogs or marshmallows.
The pyramid or upside-down fire lay creates the most heat and will burn a long time but takes the longest to reach the full flame.
How to Build a Campfire Right!
To build a successful fire, you’ll need wood to be in three sizes:
- Tinder – thin wood shavings or flakes
- Kindling – tiny sticks or thin branches
- Firewood – split logs or thick branches
Tinder often comes prepackaged in fire starter bundles that light quickly to make fire building easier.
Next up are the steps to build the different types of fire lays.
Log Cabin Method
Step 1. Create an eight to ten-inch mound of tinder and kindling.
Step 2. Lay two medium-sized logs parallel to each other on either side of the teepee.
Step 3. Stack two more logs parallel to each other on the outer corners of the wood below, going in the opposite direction, forming a square shape around the central teepee.
Step 4. Repeat adding sets of logs to build up the outer wall in a square shape until the fire lay is 12-18 inches tall.
Step 5. Add more kindling to the center, but don’t pack it so tight it blocks air circulation.
Step 6. Light the fire by starting the central teepee from the top, or you can light a chunk of the fire starter and push it under one of the elevated bottom logs to touch the inner tinder and kindling.
Lean-to Method
Step 1. Set your main log either by jamming a thick kindling log into the ground at a 45-degree angle or pointing the end sticking out into the wind.
You can also opt to lay a fat log horizontally on the ground as a base.
Step 2. Take kindling sticks and lean them on the central log from both sides, creating a triangle shape. You can also lean them at a 45-degree angle onto the base log, leaving space underneath.
Step 3. Fill the space under the kindling with tinder.
Step 4. Light the tinder and maintain the small flame until the larger kindling catches fire.
Add more kindling or logs as the fire burns down by leaning them alternately against the main log.
Teepee Method
Step 1. Build a loose pile of small kindling and tinder about five or six inches high.
Step 2. Lean larger kindling in a circular shape around the central tinder pile by having the tops touching. It may take three or four sticks leaning together to get the teepee to stand on its own.
To help build the campfire the right way, you can help stabilize it by jamming sticks into the ground while leaning the tops together. Don’t fill every open space with kindling sticks, as you need air circulation and room to reach in and start the tinder.
Step 3. Start the tinder and feed in small bits of kindling until the first teepee circle of wood catches fire. As the fire burns brightly, lean some logs against the kindling in the same teepee formation to grow a more consistent flame.
Star Method
Step 1. Create a central circle about eight inches in diameter out of tinder and small kindling.
Step 2. Using 5-7 larger logs, create a starburst design by laying them flat on the ground, with one end sitting on top of the central tinder pile and the other end pointing toward the outer edge of the fire pit.
Step 3. Ignite the tinder and kindling fuel in the center of the logs. Keep feeding the flames until the ends of the logs catch on fire.
The Upside-Down or Pyramid Method
Want to Connect With a Community of Over 1,078 RV Enthusiasts?
Step 1. Lay four or so large firewood logs next to each other on the ground, leaving small spaces in between.
Step 2. Position a new layer of slightly smaller logs 90 degrees on top of the bottom row. Leave gaps in between and balance them so they don’t roll off.
Step 3. After 2-3 layers of logs, start using kindling instead, but continue with the criss-cross stacking of the material. The pile will gradually decrease in width as you build the pyramid higher to stop the wood from falling off.
Step 4. After a few rows of kindling, start mixing up tinder into the kindling for the next layer or two, then only add tinder to the top.
Step 5. Light the tinder and watch as the flames drop down to start burning the wood below. Eventually, the fire will gain enough heat and energy to ignite the bottom logs.
It’s common for wind to blow out the top tinder or kindling before the fire can take hold. Monitor the flames for a while, or use ample fire start material on the top to ensure ignition.
A well-built pyramid fire lay can burn upwards of seven hours!
Right Way to Safely Put Out Campfire Remains After You Build One
When your campfire time is complete, you need to put it out by dousing the flames and hot embers with water until the wood is cold to the touch.
If no water is available, cover the remains with dirt to prevent any embers from blowing away.
Use a shovel or large stick to mix up the embers to cool it all down as fast as possible. Don’t just bury embers and think it’s safe to leave without checking for heat. Wind can uncover hot embers and ignite a wildfire long after you depart.
Some campgrounds will want you to shovel up campfire remains and place them in designated receptacles, as ashy runoff into local waterways can be detrimental to fish, aquatic plants, and wildlife.
Most of the time, you should try to let campfire wood burn down as much as possible to leave less of a mess for the next camper.
Final Campfire Thoughts
Camping season is in high gear, and by using the information in this guide on how to build a fire the right way, you’re ready to create lasting camping memories.
There’s nothing better than roasted hot dogs and warm s’mores to mark the end of a beautiful day out in nature or watching the relaxing flames dancing under a star-filled sky.
Now, you have the skills to start the camping season off in the best way possible by safely creating the best campfires for cooking, warmth, or gathering around for conversation and laughs.
You just have to check and even double-check that you have all the supplies to make a fire with you. Because if you forget something at home that’s necessary, you’re going to be hurting.
Camping trips and campfires go hand-in-hand, and we hope you have plenty of opportunities to practice your fire-building skills this year!
If you know anyone who is curious about building a campfire the right way, give him/her these tips!
Related Questions
1. What are some of the precautions you should take before starting a campfire in a campground?
Before starting a campfire in a campground, ensure the area is clear of flammable material like dry leaves or twigs and maintain a safe distance from tents, trees, or other structures.
Always check local fire regulations or restrictions, and never leave the fire unattended; have water or a fire extinguisher nearby to put out the fire if needed.
2. Why is it important to use local firewood when building a campfire, and what are the potential consequences of not doing so?
Using local firewood for campfires is crucial to prevent the spread of invasive species, as non-local wood can harbor harmful insects or diseases that can severely impact the local ecosystem.
If non-local firewood is used, it could lead to the destruction of native trees and plants, disrupt biodiversity, and even alter the habitat, causing long-term ecological damage.
3. What essential supplies should you bring along when planning to build a campfire, and why are they important?
When planning to build a campfire, essential supplies include a fire starter or match to ignite the fire, dry wood or logs for fuel, and a shovel or bucket of water for safety and extinguishing the fire.
These items are crucial as the fire starter or matches initiate the fire, the dry wood sustains it, and the shovel or water ensures you can control and safely extinguish the fire to prevent wildfires.
")
")


"Man cannot discover new oceans unless he has the courage to lose sight of the shore."
-- Andre Gide


")
