
Learning how to level an RV can seem confusing, but not getting it right can lead to uncomfortable or dangerous living conditions during camping trips.
That’s why it’s crucial to know the basics of RV leveling, which we share below, including helpful tips that make the process easier and quicker.
Once you combine the steps on how to level an RV trailer or motorhome with hands-on experience, you’ll quickly master the techniques and have a more enjoyable camping experience.
Why Having A Level RV Is Important
The main reason to keep your RV level is comfort. Without your camper level, you’ll have to battle these issues:
- Unsteady walking, which could lead to slips or falls
- Things rolling off the countertops or pots or pans sliding on the stovetop
- Items falling out of cabinets when you open the door, which can cause injury
- Poor ability to sleep due to the mattress being uneven
The next reason you need to level your RV is for appliances and components to work properly, such as:
- Water in plumbing lines draining efficiently
- Waste tank sensors reading correctly
- Windows, doors, and slideouts operate smoothly
- The refrigerator cooling system functioning correctly, so fluid in the coils doesn’t pool to one side
- Cabinet and appliance doors not fully closing or continually swinging open
- Avoid rooftop air conditioner condensation from pooling up and causing leaks
In addition to the above issues, when an RV isn’t level, it stresses the framing, chassis, and tires, which will shorten its lifespan.
How Level Must an RV Be For Safety and Comfort?
The goal when leveling an RV is to get it within two degrees of plumb when you place a level on the center of the floor.
If you find your camper’s front-to-back and side-to-side midpoint and lay a bubble level in each direction, the bubble should be no more than halfway outside the center lines to be within two degrees of plumb.
Trying to adjust your RV to get it precisely level isn’t necessary. It’s often difficult and time-consuming to achieve level perfection when you could be spending that time enjoying the campground or just relaxing.
While newer RV parks offer very flat concrete parking pads, parking at campgrounds in most instances means uneven gravel, grass, or dirt campsites that will require some leveling.
Living inside an RV within two degrees of plumb will feel fine as you move about and be unnoticeable in the function of appliances, furniture, and other components.
Supplies For RV Leveling
To level any recreational vehicle, you’ll need to have an array of supplies on hand. Most RVers travel with a tote full of these items:
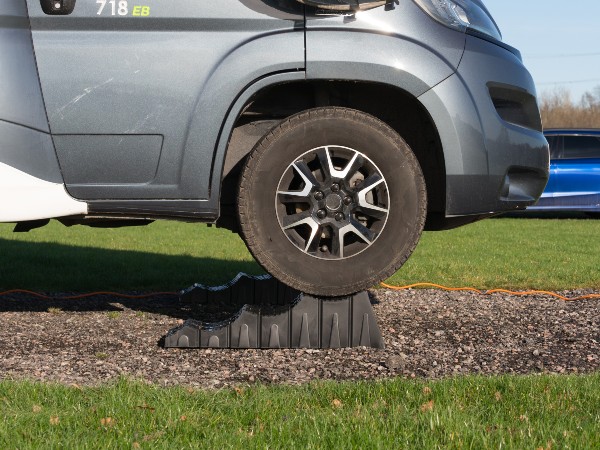
- Leveling blocks or leveling ramps
- Wheel chocks
- Bubble levels
- Cordless drill and bit to fit crank-type stabilizer jacks
Even if you’re lucky and own an RV with an automatic leveling system, you will still need blocks to place under the legs to fill gaps or create a firm surface to support the RV’s weight. You’ll also use chocks to prevent the wheels from rolling.
Hydraulic or other powered RV levelers can break, which is another reason to carry enough leveling supplies to handle the task, if necessary, manually.
Most RV leveling jobs entail using motorhome tires or trailer tires plus the hitch to get the camper even, so having enough blocks is crucial. We suggest purchasing a set of ten or twelve plastic composite blocks.
However, many people opt for wood blocks cut from a pressure-treated 2×8 or 2×10 board. Using wood is less expensive, but it is heavier, is harder to keep clean, and won’t store as neatly as snap-together plastic blocks.
We find these products are best for RV leveling:
- Camco or Lynx leveling block sets
- Leisure Coachworks T-Level or Sun Company Lev-O-Gage
- Camco Universal Flex Pads
- Ox Blox Trailer Jack Blocks
- Maxxhaul Solid Rubber Wheel Chocks
We are also a fan of the LogicBlue Technology LevelMatePRO Wireless Vehicle RV Leveling System that allows you to use your smartphone and an app to quickly even out your camper.
And if you have a small travel trailer, teardrop, or pop-up camper with a single axle, a BAL Leveler is worth the investment. You only need to slip the jack around the low-side tire and crank the mechanism to raise the tire to level the RV.
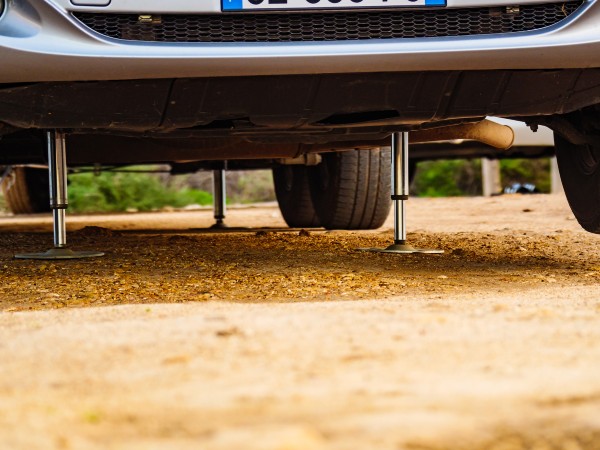
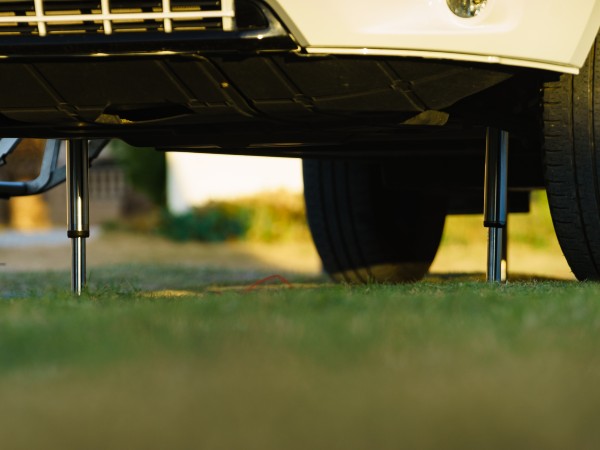
Lastly, if your camper has stabilizer jacks, using a cordless drill with the right size bit to fit the crank post makes lowering and raising the foot much quicker, reducing stress and strain on your body.
Tricks To Make RV Leveling Faster
It’s very convenient to permanently attach low-profile bubble levels to the outside of your RV. Center a bubble level on the bottom edge of each motorhome or travel trailer side and the rear center on the bumper or just above. Adding a T-level to the trailer hitch framing is another easy-to-spot location that helps you guide the RV into a level position.
Having a set of walkie-talkies or using cell phones on the speaker setting is another trick that helps the driver and the spotter communicate during the leveling process. Hearing clear commands, especially when there are loud engine noises or no eye contact between the driver and helper, reduces stress and accidents while moving the camper back and forth.
How to Level RVs With an Automatic Leveling System
You still need to follow a routine even if your RV comes with automatic levelers. Pulling in randomly to your campsite and pushing the button to deploy the leveling jacks can cause damage if they don’t seat properly and support the camper’s weight.
Start by parking your RV in the most level area of the campsite. If you have a travel trailer, place wheel chocks at the tires and unhitch the camper from the tow vehicle.
If your fifth wheel, motorhome, or travel trailer has slideouts, you must read the owner’s manual to determine if they should be open or closed when you level the rig. However, most will need you to keep the slides closed until the RV is level.
Get out your leveling blocks and place one at the location of each jack. They don’t have to be precise, just near the area under each jack.
Next, lower the back levelers part way. Stopping before they touch the ground allows the helper to move the block into the best position, so the jack foot sits entirely on the block. Leaving room also allows you to add extra blocks if the distance between the ground and the bottom of the jack is too much due to uneven ground. Finally, finish lowering the back levelers until they engage and indicate level.
Now you can lower the front levelers in the same fashion, adjusting the blocks and ensuring you fill any significant gaps with enough blocks, so the jack has support when you drop them the rest of the way.
Once the unit is level in both directions, you can open the RV slideouts and lower stabilizer jacks to complete the process.
How To Level An RV Trailer or Motorhome Manually
The steps to manually level and motorhome and trailer are a bit different, which we detail separately below.
How to Manually Level a Motorhome
Park your motorhome in the flattest spot on your campsite. You can have a spotter outside, keeping watch on a side-mounted bubble level as the driver slowly moves back or forth, giving them the thumbs up at the best location.
Move to the back of the RV and look at the bubble level. See which side of the camper needs to be raised on blocks. For example, the bubble indicates the camper’s right side is too low, so you’ll need to add blocks under the RV’s right tires to level it.
Explore the Great Outdoors with Us!
SIDE-TO-SIDE LEVELING
If the RV is within two degrees of level side-to-side, you can move to front-to-back leveling.
But, if the bubble is outside the center-level lines, you’ll need to add blocks under the low tires. If the campsite is gravel, you can also fix a slight off-level issue by pushing more stones under the tires on that side to lift them higher.
If you plan to add blocks, place them next to the RV tires on the side that need raising. Next, have the driver pull two or three feet straight forward and stop. The helper can now push the blocks (or gravel) inward to be in line with the RV tires when the driver reverses.
After the helper is safely away from the RV, the driver can slowly drive backward until the tires rest on top of the blocks. Again, the helper can talk the driver through this process because it’s hard to see whether you’re properly on the blocks from the cab.
Put the motorhome in the park, and have the helper look at the rear bubble level and see if it’s now okay. If not, you will need to pull forward, add another block, and check until satisfied that the RV is even.
If the RV is level side-to-side, you can chock the tires on the opposite side that are sitting on the ground.
FRONT-TO-BACK LEVELING
If the motorhome’s front-to-back axis is not level, you’ll need to add blocks to either the front or rear tires, depending on which end is low.
You can do this by laying blocks next to the rear or front tires, pulling forward, slipping the blocks into position in line with the tire tracks, and guiding the driver to reverse onto the blocks.
LEVELING A MOTORHOME WHEN BOTH DIRECTIONS ARE NOT EVEN
If you see your motorhome is not level in either direction, the simple fix is to lift the low back tire onto a block or two. In most instances, raising a single back tire will even out the side-to-side and back-to-front out-of-level issues enough to make the camper inhabitable and allow appliances and components to function correctly.
If the RV is still not level enough by lifting one back tire, you can pull forward again and add blocks under one or both front tires to complete the task.
Once the motorhome is level, chock the wheels and engage your stabilizer jacks to reduce movement or support the slideouts.
How to Manually Level a Travel Trailer
Back into your campsite and have your helper indicate the most level location, but do not unhitch from your tow vehicle unless you have a BAL leveler for your small camping trailer.
Check the trailer’s side-to-side level and note which side of the camper needs to be higher. Then, lay blocks next to the trailer tires on the low side, have the driver pull the trailer forward a few feet, push the blocks into position, and guide the driver as they back the trailer tire or tires onto the blocks.
Once you are happy with the side-to-side level of the trailer, you can chock the wheels and unhitch from the tow vehicle.
For the front-to-back leveling of a travel trailer, you only need to raise or lower the hitch jack by either using the manual crank or pushing the button for electric models. If you need to raise the trailer higher than the jack extends, add blocks under the jack foot to increase the distance you can lift the trailer’s front end.
Once both trailer directions are level, you can drop your stabilizer jacks onto more blocks and complete the job.
For any lightweight travel trailer that uses a BAL leveler, you only need to slip the unit around the tire on the low side, chock the wheel on the other side, and crank the unit until the side-to-side bubble level is centered. Then use the hitch jack to level front-to-back.
IMPORTANT SAFETY TIP: Never allow an automatic leveling system to lift all the tires off the ground, which is very unstable and can cause the hydraulic system to fail.
Also, stabilizer jacks are not leveler jacks. Therefore, they will not withstand the heavy weight of an RV and are only to provide extra support to reduce movement or swaying of the camper as occupants move around inside or during stormy weather.
RV Leveling Wrap Up
It takes practice to perfect leveling an RV, and each type of recreational vehicle requires slightly different techniques to do it the most efficiently. It’s also best to do this correctly because if something happens during the trip and you have no electricity, it can cause problems.
We also find it very helpful to have an experienced RVer walk you through the steps or watch YouTube videos of the process before you take your first camping trip.
Luckily, you’ll find the best method with the right supplies by following the steps above. With experience, most RVers can level their motorhome or travel trailer in under fifteen minutes, which means more time for fun!
Related Questions
- What are the potential dangers of not leveling an RV properly?
Not leveling an RV properly can lead to operational issues with systems that rely on gravity, such as the refrigerator or the plumbing, potentially causing them to malfunction or get damaged.
Additionally, an uneven RV can create discomfort for occupants due to imbalanced living spaces, and in extreme cases, it can even pose a risk of the RV tipping over, especially in windy conditions or on uneven terrain.
- Why is it important to have the right supplies for RV leveling?
Having the right supplies for RV leveling is crucial to ensure stability and safety, preventing the vehicle from moving or tipping over when parked. Additionally, a properly leveled RV ensures optimal operation of onboard appliances like refrigerators and helps maintain comfort, as doors, drawers, and sleeping arrangements function best on level surfaces.
- What are some tips for making the RV leveling process faster and more efficient?
To make the RV leveling process faster and more efficient, consider investing in automatic leveling systems that can level your RV at the push of a button, saving you time and effort.
Additionally, always ensure your tires are properly inflated and use leveling blocks or pads under your tires or jacks to help speed up the process and protect your equipment.
- How does the RV leveling process differ between automatic and manual leveling systems?
Automatic leveling systems in RVs use sensors and hydraulics to automatically adjust the vehicle until it’s level, requiring minimal effort from the user beyond pressing a button.
Manual leveling, on the other hand, involves the use of leveling blocks or jacks that the user must adjust by hand, often using a bubble level as a guide to ensure the RV is evenly balanced.
- What are some common mistakes to avoid when leveling an RV?
Common mistakes to avoid when leveling an RV include not using a level to ensure the RV is perfectly horizontal, which can cause issues with the functioning of appliances like the refrigerator.
Another mistake is not chocking the wheels before starting the leveling process, which can lead to the RV moving and causing potential damage or injury.
"Of all the paths you take in life, make sure a few of them are dirt."
-- John Muir


