
The RV is a magnificent machine. If you’re planning an extended vacation with your family, renting or buying an RV is not a bad idea. Instead of having to endure the uncomfortable confines of the family car, you and everyone onboard can enjoy the luxuries of the home if you’re traveling in an RV. To be safe, you need to know how to properly use a battery disconnect switch.
Camping is all about roughing it, but if you’re trying to ease your kids into it, using an RV for the trip is well worth considering. It’s also a good move to use an RV for camping if you want to see nature up close but don’t want to deal with the inconveniences that typically come with that.
RVs are also great if you’re going to visit your relatives in another state and want to be certain that you will have comfortable beds to stay in at the end of the day.
The RV is so useful that it’s hard to picture anyone regretting purchasing one.
However, owning an RV is not all about fun vacations and camping trips. If you are not completely aware of how to properly maintain an RV, it could wear down way earlier than it should.
In this article, you will be able to learn more about a crucial component of RV ownership and maintenance. Specifically, you will be able to learn more about what the battery disconnect switch is, and how it can benefit your RV long-term.
What Does the Battery Disconnect Switch Look Like?
If you’ve tinkered around with your RV before, then chances are that you’ve already seen the battery disconnect switch. Some notes say it looks almost like a plunger switch, so if you haven’t found it yet, keep your eyes peeled for something like that.
You may also be able to tell where the switch is by looking for the words “battery” or “battery disconnect.” To give you a better idea of where to look for the battery disconnect, try taking a closer look at the frame of the trailer, the propane tank, or even just the battery box.
Those are the locations manufacturers typically use for housing the battery disconnect switch properly.
The switch will also usually come with indicators that help you distinguish if it’s currently engaged or deactivated. Battery disconnect switches can be toggled by moving them from the “on” to “off” position and vice versa.
Other models may require a simple push of the button to activate.
Aside from being activated in different ways properly, battery disconnect switches can also vary in terms of their security features. Some battery disconnect switches feature a kind of key.
This key can be removed in order to activate the switch. The beauty of using this type of battery disconnect switch is that only you are the one who can engage or disengage the RV’s battery because you are the one in possession of the key.
Also, some RVs may have no battery disconnect switch pre-installed by the manufacturer. If you happen to own one of those RVs, you will have to purchase an aftermarket battery disconnect switch and install it yourself or have someone help you do so in order to receive its benefits.
Speaking of the battery disconnect switch’s benefits…
What Does the Battery Disconnect Switch Do for the RV?
The name does give away the main function of the battery disconnect switch, but perhaps it does not do so as effectively it should.
Basically, the battery disconnect switch is used to sever the connection between your RV’s battery and the many 12-volt fuses found elsewhere on the vehicle. Those are the same 12-volt fuses that are typically used to power the different appliances inside the RV. So remember, a 12-volt disconnect switch comes in handy.
The switch manages to effectively cut off all the fuses that would otherwise drain the battery by stopping the flow to the negative cable.
You can kind of think of the battery disconnect switch as something that works similarly to the power button on your smartphone. When you’re phone is at 100 percent, you unplug it from your charger.
However, even if your phone was fully charged when it was unplugged, it won’t remain in that state because the batteries discharge.
Even if you didn’t use your phone, you may look at it 20 minutes later and notice that it’s now only at 97 or perhaps 96 percent. The only real way to make sure that your phone remains at 100 percent after you unplug it from the charger is if you switch it off after.
Some battery discharge may still take place, but it will happen significantly slower.
The battery disconnect switch essentially does the same thing for your RV’s battery. Once the battery disconnect switch has been engaged, it will effectively prevent the RV’s battery from being drained.
For those who may be unaware, the electrical appliances in your RV are not completely turned off even after you have switched them off. Even in their “off” state, these appliances may slowly siphon energy from the battery of your RV.
It’s the same thing you have to deal with at home. Even after you turn off your appliances, they can still slowly run up your electric bill if you keep them plugged in.
You have to take them out of the socket completely if you want to ensure that they don’t impact your electric bill any more than they need to.
By the way, your RV will be completely powered off if you choose to activate the battery cutoff switch. That said, there is still a way for you to use the appliances inside even if the battery disconnect switch is currently active.
To do so, you will have to plug your RV into an electrical outlet offshore. By plugging the RV into that offshore electrical outlet, you will be able to power up some of the appliances inside the vehicle using the power converter or inverter as opposed to the battery.
Why Is the Battery Disconnect Switch Important?
Now that the appearance of the battery disconnect switch has been properly identified and its main function cleared up, it’s time to understand why you need this particular component on your RV.
The most obvious benefit of having a functional battery disconnect switch installed on your RV is that it will mitigate potential battery loss that could significantly alter your plans.
For instance, you may have a trip lined up for this coming weekend. You have everything set up and ready to go, but just as you’re packing everything into the RV, you suddenly remember that you forgot to charge it a few days ago.
At that point, your only options are to move forward with the trip knowing that the amenities inside the RV that are supposed to make traveling easier will remain inaccessible, or you could postpone the trip.
With a battery disconnect switch installed on your RV correctly and properly, you won’t have to deal with that kind of problem.
As long as you remember to activate the battery disconnect switch the moment the RV is parked in your garage, it will still have a lot of battery life left the next time you decide to take it out for a trip.
That’s obviously assuming that your RV’s battery still had a lot of juice remaining when you parked it in your garage in the first place.
The battery disconnect switch can act as a kind of fail-safe in that scenario.
Another reason why it’s so important to have a battery disconnect switch installed on your RV properly is that it’ll help prolong the life of your battery.
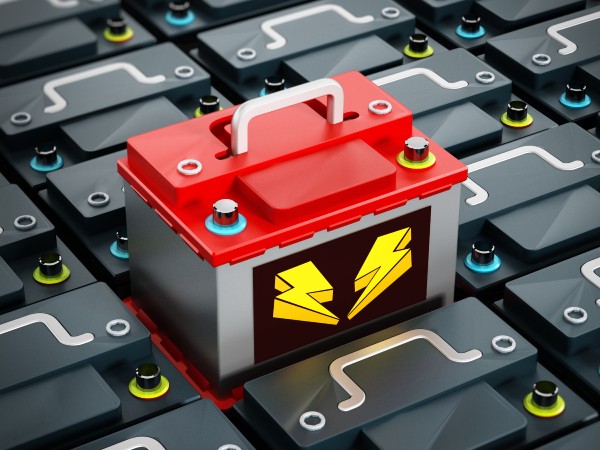
According to National RV Detroit, the specific makeup of the RV battery can make it prone to malfunctioning earlier than expected. Contained within the RV battery are several positive and negative lead plates.
These lead plates are also surrounded by an electrolyte solution that is made up of both water and sulfuric acid.
When working, the positive plates will transfer electrons to the negative plates via the electrolyte solution surrounding them. That event also leads to the sulfuric acid being removed from the electrolyte solution.

- High Performance: The Wattcycle LiFePO4 battery has a capacity of 100Ah and a standard voltage of 12.8V. It features A+…
- Built-in BMS Protection: The battery incorporates a built-in 100A BMS protection plate that automatically disconnects…
- Compact Design: Measuring a mere 10.2×6.6×8.2inches (26x17x21cm) and weighing only 23.2lbs (10.5kg), our battery boasts…
- Low Temperature Protection: Designed to withstand extreme temperatures, our battery can operate in conditions as low as…
- Series or Parallel Connection: You can easily connect up to 4 batteries in series or 4 battery packs in parallel,…
- Perfect Fit: Our 100Ah LiFePO4 battery is thoughtfully designed to seamlessly fit the Group-24 battery box, eliminating…
- Customer Support: For any inquiries or concerns, please don’t hesitate to find us via the provided contact information…
The sulfuric acid then ends up sticking to the plates found throughout the RV battery.
At first, the sulfuric acid being on the lead plates is not a significant issue.
Once enough sulfuric acid gathers on the plates though, it can prevent the electron transfer from taking place, and by extension, it will also keep the battery from working as intended.
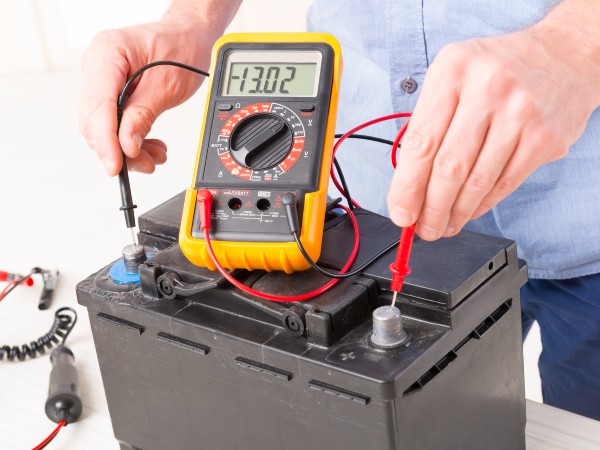
In order to return the RV’s battery to a state where it can work, you will have to shake the sulfuric acid loose from the plates and drop it back into the water. You can do that by applying electricity to the battery.
That happens through the process of charging.
This is where the battery disconnect switch can come in and provide a very valuable function.
If your RV’s battery constantly falls under an 80 percent charge or if it goes below 50 percent every now and then, that can lead to a huge problem developing. To be more specific, that can result in sulfuric acid hardening on the plates.
The hardened sulfuric acid will no longer fall back into the water to make up the electrolyte solution even if it gets a jolt from electricity.
To put it simply, the hardened sulfuric acid that is produced by your battery being drained either too often or too much can lead to the battery itself no longer working. Your only option at that point will be to purchase a new battery for your RV and they don’t come cheap.
The key is to not even put your battery in a position where it could suffer from those potential issues. You can do that by making use of your battery disconnect switch.
If you’re not planning to use your RV for a while, you can engage the battery disconnect switch so that the battery does not get needlessly drained.
Activating the battery disconnect switch when the RV will not be used anytime soon is a good way to prevent the battery’s charge level from falling below 50 percent without you knowing about it.
Because you’re taking good care of your RV battery, charges will also be able to hold better and the battery level won’t dip below 80 percent as quickly.
Remember to activate the battery disconnect switch for your RV’s battery at the right times and you won’t have to worry about the charge level falling under those aforementioned thresholds from earlier.
That means the battery currently working in your RV should be able to last for a longer period of time.
One last thing, you should always activate the battery disconnect switch because it will keep your vehicle safe. With the battery activated, a thief could sneak inside your RV, hotwire it, and make off with a valuable vehicle.
If you remember to activate the battery disconnect switch before you placed the RV in storage, stealing it will be way harder to pull off.
Should the Battery Be Disconnected When the RV Is Linked to an Offshore Electrical Outlet?
After you get to your destination following a long and exhausting drive, your RV’s battery may be pretty drained as well. If you find an outlet at your destination, chances are that you’ll want to plug the battery in.
To speed up the charging process, you may even think to activate the battery disconnect switch.
Prior to doing any of that, there are some things you should know.
As noted previously, you can continue to use the appliances inside your RV with the battery disconnect switch activated because of the converter present in the vehicle. However, this may not be true for all the appliances you have onboard.
The appliances in the RV that rely on the 12-volt fuses to function properly will not be able to work if the battery is completely shut off. Only the appliances that can work without the help of the 12-volt fuses will be made accessible to you.
Also, because the battery disconnect switch completely cuts off access to your RV’s battery, that has the unintended effect of blocking any electricity that could be working to charge it.
Instead of being able to use your time near an electrical outlet to use more of your RV’s features and to replenish its battery life for the trip ahead, you aren’t really doing it any favors by shutting it down via the disconnect switch.
Whenever you’re able to park near an accessible electrical outlet, go ahead and keep the RV’s battery open. That will be better for you and the battery.
How Is the Battery Disconnect Switch Installed?
Hopefully, your RV already comes equipped with a battery disconnect switch so you don’t have to do any additional work. That’s not always the case though, and you may be among the RV owners who will have to manually install the battery disconnect switch.
You could just go ahead and continue using your RV without the disconnect switch, but it’s already been established that doing so is not good for the long-term health of your battery.

Don’t worry. Installing a battery disconnect switch manually is a pretty simple and straightforward process. I’ve heard that you can get the task done in about an hour or so.
You will also only need a Philips screwdriver and a drill for the job.
You can read about the process below.
Step 1: Identify the Specific Type of Battery Disconnect Switch Your RV Needs
Because the battery disconnect switch is already a special type of vehicle component, you may assume that any model you get will work on your RV. Assuming that could be a very costly mistake.
RV batteries can vary in terms of their power output. Battery disconnect switches are also configured differently based on those numerous power output levels.
What you need to do here is to check your RV’s manual or even look at the battery itself to see its power output level. After doing that, you can head to the store or go online to purchase a battery disconnect switch that matches up with your RV’s battery.
The output levels of the battery and the switch have to match exactly. If they don’t, you can run into some big trouble in the near future.
Step 2: Disconnect the Cables from the Battery
You can replicate the effect of a battery disconnect switch by disconnecting the negative cable from your battery. Because of that, you may think that you only need to take out the negative cable when you’re installing the switch.
Removing the negative cable but leaving the positive one connected is needlessly risky. You may still be able to install the switch without touching the positive cable, but you’ll be better off just removing them both.
Explore the Great Outdoors with Us!
Step 3: Work on the Terminals and the Switch
Next up, you have to take out the battery clamp and then clean off the terminals while you’re at it.
With the terminals cleaned, you can now move on to removing the negative cable terminal. Use a Philips screwdriver on the negative cable terminal to unfasten it and then wire the battery disconnect switch to the negative terminal.
The battery disconnect switch should go in between the terminal and the cable.
With the switch all wired up, you can focus on reconnecting the terminal you removed earlier.
Step 4: Mount the Battery Disconnect Switch
Look for a good spot that can hold the battery disconnect switch. Once you’ve found a good spot, drill a few holes in it and mount the battery disconnect switch.
You can use the other items included with the switch to mount it properly.
Step 5: Reconnect the Cables to the Battery
With all that out of the way, you can link the cables back to the battery.
Remember to toggle the battery disconnect switch so that it is engaged. This will prevent any blowouts from happening later on.
All that’s left to do now is to start up your RV and check if the switch is working as intended.
Conclusion
The battery disconnect switch is one of the more important components of your RV. That underappreciated switch can help your RV’s battery stay in service for years, effectively saving you plenty of money in the process.
If you want to properly maintain your RV, you can’t forget to use your battery disconnect switch whenever the vehicle goes into storage.
Related Questions
- What are some common locations where the battery disconnect switch is typically located in an RV?
Common locations for the battery disconnect switch in an RV include near the main control panel or electrical distribution center, inside a storage compartment, or near the batteries themselves.
It is important to consult the RV’s manual or contact the manufacturer for specific information regarding the location of the battery disconnect switch.
- How does the battery disconnect switch help in prolonging the life of an RV’s battery?
A battery disconnect switch helps prolong the life of an RV’s battery by preventing parasitic loads, or small but continuous electrical drains, when the RV is not in use.
By cutting off the connection, it ensures the battery isn’t being unnecessarily depleted, thus extending its overall lifespan.
- What are some of the security features that battery disconnect switches may have?
Battery disconnect switches often incorporate key-operated locks or removable keys as security measures.
Additionally, some switches are equipped with tamper-proof seals or covers to prevent unauthorized access or tampering.
- How does the battery disconnect switch prevent the RV’s battery from being drained?
The battery disconnect switch interrupts the electrical connection between the RV’s battery and its electrical system, effectively cutting off power flow.
By doing so, it prevents any parasitic loads or devices from drawing power from the battery when the RV is not in use, thereby preserving its charge and preventing drain.
- If an RV doesn’t come with a pre-installed battery disconnect switch, what are the steps to install an aftermarket one?
To install an aftermarket battery disconnect switch in an RV without a pre-installed one, begin by selecting a suitable switch and locating a suitable location near the battery.
Then, connect one side of the switch to the positive terminal of the battery and the other side to a ground point, ensuring proper electrical connections and safety precautions.
"Of all the paths you take in life, make sure a few of them are dirt."
-- John Muir


