
Do you want to build your own truck camper but aren’t sure if it’s worth it?
The answer depends on your carpentry skills, but a home-built truck camper is a doable DIY project with the right plans, supplies and patience.
To help you along, we put together this guide that explains what makes a one different from other recreational vehicles and steps on how to build a lightweight truck camper to fit any size truck bed.
If this sounds interesting, keep reading to learn more!
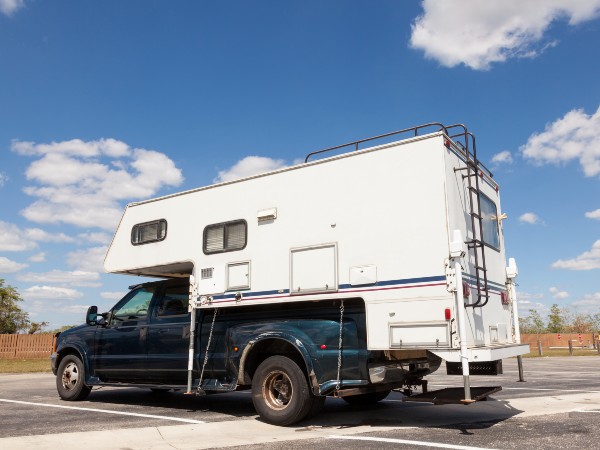
What Is a Truck Camper?
Enclosed “tents” on the back of pickup trucks began their rise to popularity after the initial model and designs came out in the 1950s.
While early models were permanently attached to the truck bed, the solid-wall camper designers began to offer removable truck campers that stood on legs when not in transit.
The ability to have protection from the elements while camping yet still have full use of your truck makes owning a truck camper attractive. RVers who love off-grid camping appreciate how this type of vehicle can go where a typical recreational vehicle won’t fit.
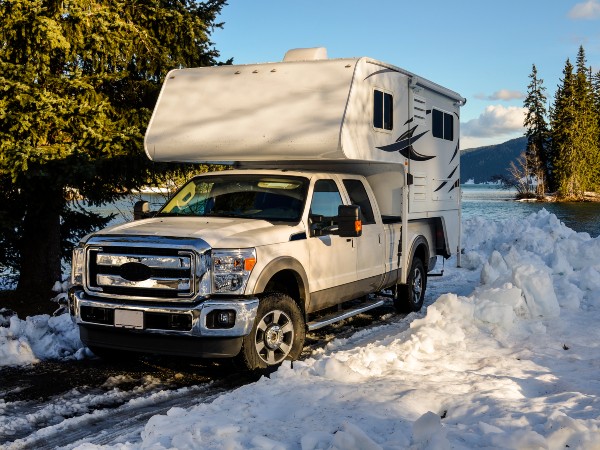
Today, truck campers are top sellers in the RV industry, but most models look the same and often have a sticker price higher than many budgets allow.
The cost and design restraints are a huge reason many people turn to a homemade truck camper build they design themselves or create using pre-made plans.
Whenever you go truck camping, it’s a big benefit to take a camping hammock with you!
Types of Truck Campers
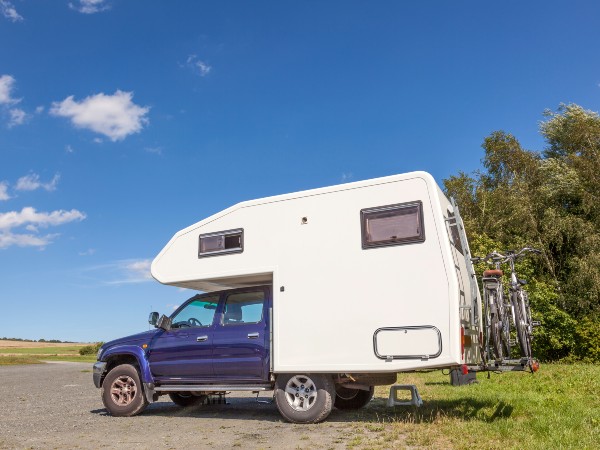
The two styles of truck campers are stationary or removable. When building a homemade truck camper, you’ll first decide which style is best for your needs.
Stationary models are permanently attached to the truck bed framing. The build is more stable and solid overall while traveling.
Removable truck campers slide inside the truck bed and hold in place with strapping and bracing while driving. You use a jack system to lift the camper from the truck bed at the campground or for storage.
Stationary Truck Camper Pros and Cons
PROS:
- Is an easier and more stable build
- Eliminates the hassle of loading/unloading the camper
- Saves money and weight on the jack system
- More campground accessibility
CONS:
- Cannot use truck bed for other purposes
Removable Truck Camper Pros and Cons
PROS:
- Allows use of truck for other camping/personal purposes
- Easier to store the camper when not in use
CONS:
- Cost more to build
- The camper shell is less stable during travel
- Some RV parks forbid detachable truck campers
Does A Truck Camper Need a License Plate?
The following states require you to plate and register truck campers:
- Rhode Island
- Indiana
- Tennessee
- Mississippi
- Utah
- Idaho
- Montana
- Oregon
- Washington
All other states do not require registration as they deem a truck camper as “cargo” since it rides in the truck’s bed.
Average Cost to Build a Truck Camper
The average home-built truck camper cost is around $4,000.
Some people build one for under $500 by using recycled supplies and keeping the design basic.
Other people can spend $6,000-$10,000+ for a deluxe version with all the bells and whistles even high-end dealers don’t include.
With new truck camper pricing at $12,000-$48,000, there’s good cause for interest in how to build a truck camper to save money and customize the RV to suit your needs perfectly.
When you go camping this way, remember to bring with you a good hammock or two. You’ll need them!
Things To Know Before You Start a DIY Truck Camper
Truck Weight Capacity
You must know the GVWR (gross vehicle weight rating) of your truck before you start planning your homemade truck camper build.
Creating a camper shell too heavy or tall will create unsafe driving conditions and tax the chassis, engine, and brake system of your pickup truck.
Please consider the total weight of all your building supplies, along with your furniture, appliances, waste tanks, batteries, camping supplies, food, clothing, passenger weight, and fuel in GVWR.
Start backward by weighing all possible passengers, add 200 pounds for camping gear and food, and calculate the weight of a full tank of gas in your truck.
Once you have this total number, you can subtract it from the GVWR and start working with the pounds you have left.
Lumber is the first place you’ll be cutting weight, so plan to be building the framing with 2x2s or with lightweight but more expensive aluminum studs.
Truck Camper Size Considerations
Truck campers tend to be top-heavy. Many trucks have lifted tires that increase the height of the truck bed, and therefore your camper shell.
The taller you build the camper, the higher the chances of the truck camper wanting to tip over when making sharp turns or in high winds.
The key to a good design is to keep the center of gravity as low as possible by consolidating heavier appliances and ample storage compartments near the truck bed floor.
Measure your truck bed before drawing out your camper design. The spacing between wheel wells and the height of your bed sidewalls are different between makes and models, so there isn’t a one-size-fits-all DIY truck camper plan to follow.
There are online sources for homemade truck camper plans and videos you can watch to help you formulate your final design and supply list.
Most truck camper designs hang over the truck cab to extend living and storage space. If this is part of your design, create a shape that offers the least wind resistance for safety, stability, and fuel economy.
How to Build a Lightweight Truck Camper
Truck Camper Build Supply List
Here’s a general supply list to build your own truck camper:
- Wood 2x2s or aluminum studs
- Plywood
- Foamboard insulation
- Exterior siding
- Metal or rubber sheeting for the roof
- Door and windows made for RVs
- Tools, nails, screws, glue, brackets, caulk
You’ll need paint or stain, appliances, a toilet (optional), a mattress, water/waste tanks, and other supplies to finish the truck camper, depending on your needs.
Step 1. Truck Camper Design
On grid paper, lay out your truck’s dimensions so you can create a drawing of the shape and size of the camper framing you’ll need to build.
Once you have a design you like, decide if you want a stationary or removable unit. If you’re going to take the camper off the truck, you’ll need to adjust some dimensions to allow for the installation of the jack stands.
Sketch out where studs will need to go to support the floor, roof, and walls. Allow spaces for windows, roof A/C, and the entry door. Tally up the stud count to add to your shopping list.
Sketch out your plans for lighting or plumbing needs, so you can figure out how many feet of wire, outlet boxes, light switches, and PEX piping you’ll require.
If you plan to power your camper off house batteries, plan out the wiring routes for that as well.
Step 2. Build the Truck Camper Framing
Take your wood or aluminum and start building your basic frame beginning with the interior of your truck bed.
A permanent truck camper is easier to build in place as you can bolt it directly to the truck, which adds instant stability.
Do expect the framing to be wobbly at first. The more studs you add, the more rigid it will become, but it won’t be super stable until you add the exterior and interior sheathing.
Most people who build removable truck campers will create the bare frame on the truck, then pull it off and finish the build on the ground until it’s time to install the jack system.
Use clamps to hold pieces together until you can screw or glue and nail them together.
Step 3. Add Plywood to the Truck Camper Frame
Cut and install 1/4″ or 1/2″ plywood to fit the exterior of the framing. Use screws for a tight connection. Start with the sides to firm up the walls, then move to the roof.
Keep spaces open for the installation of windows, doors, or air conditioners at a later time.
While thicker plywood is more rigid and durable, make sure your truck can handle the extra weight before using it.
Use 3/4-inch plywood for the floor to have a solid base that can hold up under the entire weight of the camper.
Explore the Great Outdoors with Us!
Step 4. Install Plumbing and Electrical Lines
Using your design plans, start installing boxes for electrical connections and lights and run wiring between them all.
You can install a fuse box, and an RV 30-amp plug and cord for direct power connections at campgrounds or run wiring to a self-contained 12-volt battery system.
Follow the same plan for plumbing lines if necessary from your sink to a holding tank. Some people prefer to have a removable waste tank, while others use a more standard RV permanent tank that attaches to a hose for the disposal of contents.
Step 5. Insulate Truck Camper Ceiling and Walls
Now it’s time to add insulation on every interior surface inside the truck camper shell.
Foam board insulation is easy to work with and adds another layer of rigidity to the framing on walls, floor, and ceiling.
Stuff small gaps with batting insulation to ensure a tight seal against the elements. Good insulation will keep sound and heating, and cooling under control.
Step 6. Finish the Truck Camper Interior
Finish the interior by laying down your flooring of choice and adding paneling to the walls and ceiling.
Ensure any wiring or plumbing are safe from an accidental encounter with a nail or screw by adding a protective metal barrier over the lines.
Mark out your stud locations so you have solid material to screw into without needing to guess. Use the screw heads, later on, to help you install any cabinets or bed framing securely.
Step 7. Finish Interior Amenities
Install remaining cabinets, counters, or seating or sleeping quarters.
Sand down any rough surfaces, then caulk up all the seams and gaps with a high-stretch caulk.
Once the caulk dries, you can paint or stain the interior surfaces.
After painting, you can install your appliances and other amenities along with your mattress and any other decor.
Step 8. Install Truck Camper Door and Windows
Install the door, and any windows you have in your home-built truck camper design.
Using RV windows and doors makes for rugged road travel and will prevent the issues you’ll find will occur when using standard residential options like cracking glass or warping from the constant movement of the framing and truck.
Step 9. Truck Camper Exterior Finish
Finish off your roof with a waterproof material, such as rubber sheeting. Rubber is easy to install with a proper sealant and should hold tightly to the plywood roof.
Some people also use thin aluminum sheeting on the roof or paint over the plywood with a paintable flexible roof coating.
After the roof, work your way to the exterior walls and install your siding of choice. Popular truck camper siding materials are:
- Gel coat fiberglass sheeting
- Vinyl or PVC siding
- Wood shake or planks
- Powder-coated aluminum sheeting
Some people forgo extra siding and caulk and paint the plywood with several coats of exterior paint. Paint is very economical but may not withstand harsh weather conditions.
Step 10. Truck Camper Lift Jack Installation
If you have a removable truck camper design, your last step is to install the lift jack kit.
Follow the manufacturer’s instructions on your manual or electrical truck camper jack systems for truck campers.
Kits usually include turnbuckles, brackets, jacks, remote controls, and other accessories to install the four legs into position so it can hold the weight of the camper shell when off the truck bed.
Test run the jack system to ensure it operates safely and correctly.
Conclusion
Now that you know how to build a truck camper, you can customize a unit to fit your budget and RVing needs.
Truck campers are easy to drive and provide all the protection you need while camping, so check out some truck-camper-friendly campgrounds and reserve your spot.
Truck & Camper Pros and Cons (Video)
Related Questions
- What are the key differences between stationary and removable truck campers?
Stationary truck campers are designed to be permanently attached to the bed of the truck, providing a stable and secure living space, but limiting the truck’s versatility for other uses.
On the other hand, removable truck campers can be detached when not in use, offering the freedom to utilize the truck for other purposes, but may require additional setup and take-down time.
- How does the Gross Vehicle Weight Rating (GVWR) impact the design and construction of a truck camper?
The Gross Vehicle Weight Rating (GVWR) significantly impacts the design and construction of a truck camper as it dictates the maximum allowable total weight of the camper, including its contents and passengers, which the vehicle can safely support.
Design elements such as frame strength, axle capacity, suspension, and braking systems are calibrated to meet this weight limit, ensuring safety, efficiency, and longevity.
- What are the considerations for installing plumbing and electrical lines in a DIY truck camper?
When installing plumbing and electrical lines in a DIY truck camper, consider the spatial constraints of the vehicle, the safety requirements, and the necessary power usage for your intended appliances.
Additionally, ensure proper insulation of electrical wires, use of leak-proof plumbing fixtures, and compliance with local codes and regulations to avoid any potential hazards.
- How does the choice of materials for the exterior finish of a truck camper affect its durability and weather resistance?
The choice of materials for the exterior finish of a truck camper significantly impacts its durability and weather resistance, as materials such as aluminum and fiberglass can withstand harsh conditions, resist corrosion, and provide UV protection.
Furthermore, the superior insulative properties of these materials can improve longevity by mitigating the effects of temperature fluctuations and reducing the wear and tear on the camper’s interior components.
- What are the steps involved in installing a lift jack kit for a removable truck camper?
Installing a lift jack kit for a removable truck camper involves several steps.
First, you need to position the jacks according to the manufacturer’s instructions, ensuring they align with the camper’s weight distribution, then secure them using the provided hardware, which usually involves drilling and bolting.
"Of all the paths you take in life, make sure a few of them are dirt."
-- John Muir


